

Learn how to calibrate hygrometer effectively to protect your cigars. Ensure optimal humidity for flavor and quality. Enjoy your collection!
Learning how to calibrate a hygrometer is not optional for a serious cigar collector. It is the difference between a humidor that genuinely protects your collection and one that only appears to. An uncalibrated hygrometer can read five or even ten percentage points off from true relative humidity, quietly exposing your cigars to conditions that dry them out, crack their wrappers, or invite mold. The methods covered here apply to both analog and digital devices, and none of them require specialized equipment. What they do require is patience and precision — two qualities every dedicated aficionado already brings to the craft.
Table of Contents
- Key takeaways
- What you need before calibrating a hygrometer
- Calibrating a digital hygrometer with the salt test
- Calibrating an analog hygrometer: the salt test and beyond
- Common calibration mistakes and how to avoid them
- Verifying calibration and maintaining optimal humidity
- My perspective on calibration as a cigar collector’s ritual
- Protect your collection with Dunnluxuryselections
- FAQ
Key takeaways
| Point | Details |
|---|---|
| Calibration accuracy protects flavor | Even a small humidity error accelerates aging unevenly and degrades the oils that define a cigar’s character. |
| Salt test is the gold standard | A sealed container with saturated salt solution creates a stable 75% RH reference point for calibrating either device type. |
| Analog requires more patience | Allow at least 24 hours for analog stability before adjusting the calibration screw. |
| Offset recording is a valid workaround | When a device lacks adjustment controls, record the deviation from 75% and apply that offset to every future reading. |
| Recalibration is a scheduled ritual | Analog hygrometers benefit from recalibration every six months; digital devices at a minimum annually. |
What you need before calibrating a hygrometer
Good preparation separates a calibration that holds for months from one that drifts within weeks. Before you touch your hygrometer, gather every item on this list. Nothing here is expensive or hard to find, but skipping any of it will compromise your results.
For either device type:
- Non-iodized table salt (roughly one teaspoon)
- A small amount of distilled or filtered water
- A zip-lock bag or airtight container large enough to hold the hygrometer without touching the salt solution
- A bottle cap or small dish to hold the salt mixture
- A stable surface away from windows, vents, and direct sunlight
Additional items for analog hygrometers:
- A small flat-head screwdriver to access the calibration screw on the back of the device
- Extra patience: analog devices need more time to reach equilibrium
For digital hygrometers with calibration controls:
- The device manual, or a quick reference to its calibration button sequence
- A notepad to record offset values if the device lacks adjustment features
The environment where you run the calibration matters as much as the tools themselves. Stable room temperature and no airflow are non-negotiable conditions. A draft near the sealed container will introduce temperature variance that shifts the equilibrium humidity inside, which means your reference point is no longer trustworthy. Choose a countertop away from the kitchen or bathroom, and keep the room at a consistent temperature for the full calibration period.
| Setup element | Analog hygrometer | Digital hygrometer |
|---|---|---|
| Calibration tool needed | Small flat-head screwdriver | Calibration button or offset feature |
| Minimum wait time | 24 hours | 6 to 8 hours (ideally 12) |
| Salt quantity | 1 teaspoon in small dish | 1 teaspoon in small dish |
| Container type | Sealed zip-lock bag or box | Sealed zip-lock bag or box |
| Adjustment method | Manual needle screw | On-device controls or offset recording |
Calibrating a digital hygrometer with the salt test
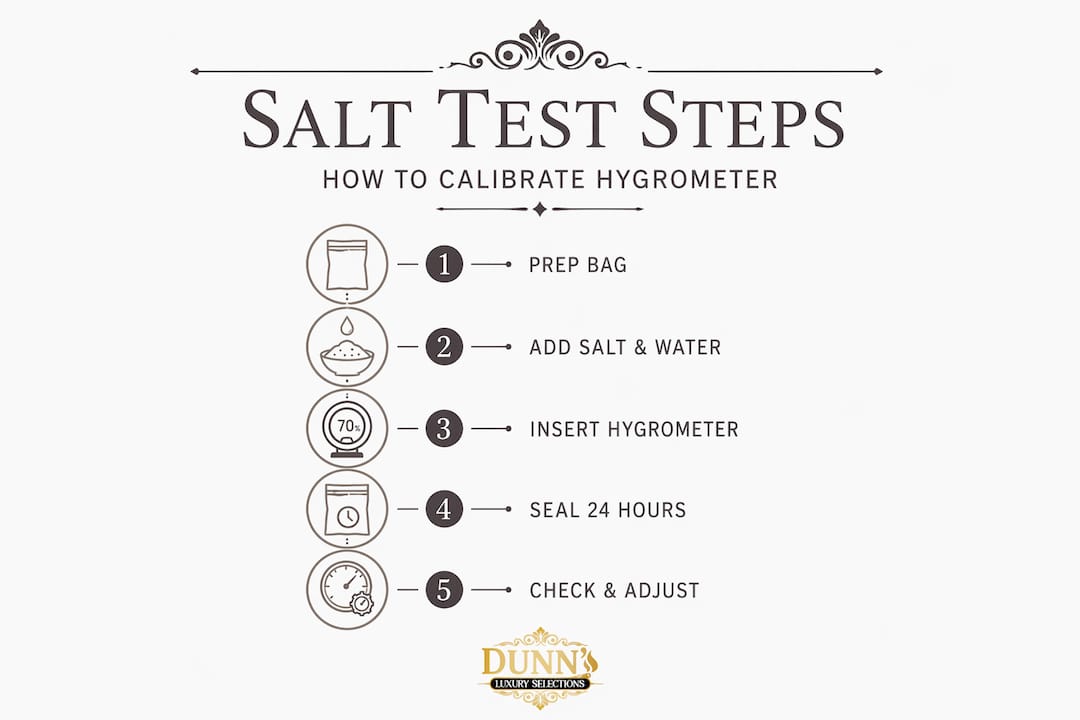
This is the method most cigar enthusiasts rely on, and for good reason. It creates a chemically stable reference point at exactly 75% relative humidity, allowing you to compare your device’s reading to a known standard and adjust accordingly. Follow these steps precisely.
-
Prepare the salt solution. Place one teaspoon of non-iodized salt into a bottle cap or small shallow dish. Add just enough water to make the salt damp throughout. You are aiming for a paste-like consistency, not a pool of liquid. Excess water lowers the effective humidity inside the container, which defeats the purpose of the test.
-
Set up the sealed container. Place the damp salt dish and your digital hygrometer side by side inside an airtight zip-lock bag or sealable container. The hygrometer should not touch the salt or the water. Seal the container completely.
-
Wait for equilibrium. Leave the sealed container undisturbed on a stable surface. 6 to 12 hours is the recommended window for digital devices. Resist the urge to check it early. The humidity inside needs time to stabilize at 75% before your reading means anything.
-
Read the display without opening the container. Once the wait time has passed, check the reading through the container wall or bag. The number displayed is your device’s actual reading at a true 75% RH environment.
-
Calculate the deviation. Subtract 75 from whatever your device shows. If it reads 78%, your offset is plus three. If it reads 71%, your offset is minus four.
-
Adjust or record the offset. If your digital hygrometer has a calibration button or offset setting, use it to correct the reading to 75%. If no calibration feature exists, write down the offset and apply it mentally to every future reading. A device that consistently reads three points high simply means your true humidity is three points lower than the display.
Pro Tip: Place the hygrometer face-down toward the bag surface so you can read the display without unsealing anything. Opening the bag mid-test allows ambient air to enter and resets the equilibrium you worked hours to establish.
Calibrating an analog hygrometer: the salt test and beyond
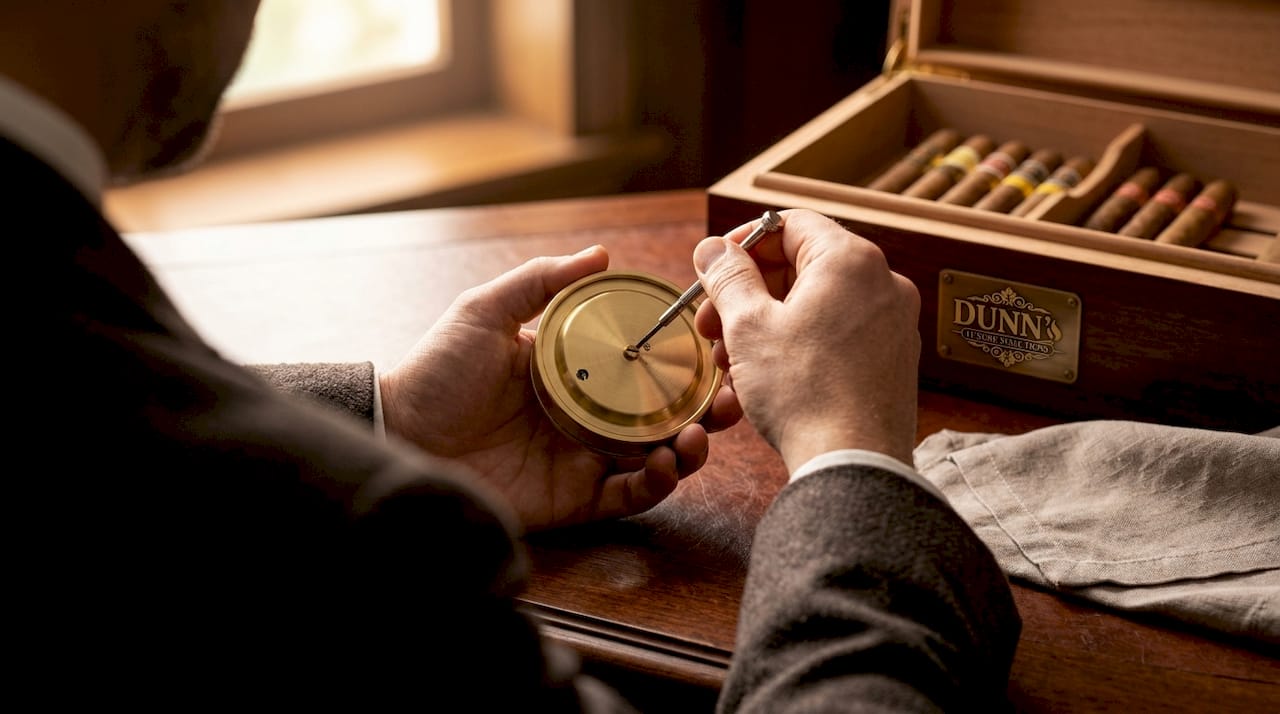
Analog hygrometers demand more care, more time, and a steadier hand than their digital counterparts. The mechanical needle that gives them their classic aesthetic is also the reason they drift more frequently and require closer attention during calibration.
The 24-hour salt test for analog devices
The process mirrors the digital method, but the timeline is extended. Analog devices require a full 24 hours to reach true equilibrium inside the sealed container. Do not rush this. Attempting to read or adjust the needle before stabilization is the single most common mistake among enthusiasts who are new to analog calibration.
- Prepare the salt paste using the same method described above: one teaspoon of non-iodized salt, a small amount of water, paste-like consistency.
- Seal the hygrometer and salt dish in an airtight container or bag, keeping them apart from each other.
- Leave undisturbed for 24 hours. Set a reminder and walk away. Temperature must remain constant throughout.
- Read the needle without disturbing the setup. Note the reading.
- Locate the calibration screw on the back of the analog hygrometer. With a small flat-head screwdriver, gently turn the screw until the needle rests at 75%. Adjustment warnings from calibration specialists are consistent: move the screw in small increments, and give the needle a moment to settle before turning again.
- Reseal and verify. If possible, seal the device again for a few hours after adjustment to confirm the needle holds at 75%.
Pro Tip: Mark the original needle position with a small piece of tape before adjusting. If you overshoot the adjustment, you will know exactly how far to reverse it without guessing.
The salt test works because it exploits a fundamental property of saturated sodium chloride solution: regardless of temperature within normal room ranges, it produces a stable 75% RH environment around it.
“Patience is the most important calibration tool an analog hygrometer owner possesses. The needle cannot lie once equilibrium is reached, but it will mislead you completely if you read it too soon.”
Common pitfalls to avoid with analog devices:
- Using too much water turns the salt into a liquid, which does not produce a stable 75% RH environment.
- Adjusting the screw while the container is open exposes the device to ambient air, invalidating the calibration condition.
- Forgetting to verify after adjustment means you cannot confirm the needle holds its position over time.
For longer-term analog accuracy, consider the alternative steam method as a secondary verification check. Hold the hygrometer briefly over a cup of boiling water at a distance, where the humidity is approximately 100% RH, and observe whether the needle reaches near that figure. This is a rough check, not a precise calibration, but it confirms the needle is moving across its full range.
Common calibration mistakes and how to avoid them
Calibration errors rarely announce themselves. Instead, they quietly allow your humidor to drift toward conditions that damage your cigars over weeks or months. These are the mistakes worth knowing before you make them.
- Rushing the salt test. Reading the hygrometer before the sealed environment reaches equilibrium means you are comparing your device to an unstable reference point. The result is an adjustment that is wrong from the moment you make it.
- Wrong salt paste consistency. Too much water alters the chemistry of the solution. Improperly wet salt disrupts the RH equilibrium that makes the test reliable. The mixture should look like wet sand, not soup.
- Temperature fluctuations during the test. Even a brief draft from an HVAC vent or an open window can shift the humidity inside the sealed container. Choose a location with no airflow and consistent temperature throughout the entire calibration window.
- Ignoring calibration drift. A hygrometer that was accurate six months ago may not be accurate today. Environmental changes and device aging both contribute to drift in hygrometer readings, making a fixed calibration schedule non-negotiable.
- Treating all devices as calibration-capable. Some analog hygrometers, particularly those built into the humidor lid, have no accessible calibration screw. For these, offset recording is the only practical solution.
Pro Tip: If you suspect your hygrometer has drifted but you are not sure by how much, run a quick salt test before making any adjustments to your humidor’s active humidification. Acting on a faulty reading compounds the problem.
Verifying calibration and maintaining optimal humidity
Calibrating your hygrometer is the beginning, not the end. Verification and ongoing maintenance are what actually protect your collection over years of collecting.
Once you have completed the salt test and made your adjustments, the first verification step is to place the calibrated hygrometer back in your humidor and observe the reading for 24 to 48 hours. Ideal cigar storage sits around 70% RH, with a tolerable range between 65% and 75%. Readings consistently outside that band suggest either a calibration error or a humidification issue that needs direct attention.
For ongoing accuracy, build a recalibration schedule into your humidor maintenance routine. Analog devices benefit from recalibration every six months, or more frequently if you notice the readings shifting. Digital hygrometers hold their calibration longer but should be verified at minimum once per year. Multi-point calibration across humidity levels offers the highest confidence in a hygrometer’s overall accuracy, though for most cigar enthusiasts the 75% salt test provides a reliable and practical single-point reference.
| Humidity level | Condition | Risk |
|---|---|---|
| Below 65% RH | Too dry | Wrapper cracks, oils evaporate, flavor flattens |
| 65 to 75% RH | Ideal range | Cigars age gracefully and burn evenly |
| Above 75% RH | Too humid | Mold growth risk, tobacco swells, draw tightens |
Beyond calibration, consider pairing your hygrometer with Boveda or similar two-way humidity packs inside the humidor. These packs actively buffer moisture, absorbing excess humidity or releasing it as needed, which means your calibrated hygrometer is monitoring a genuinely stable environment rather than a fluctuating one. For more detailed guidance on preserving your collection’s quality, Dunnluxuryselections has assembled expert resources that cover humidity management from every angle.
My perspective on calibration as a cigar collector’s ritual
I have seen collections ruined not by neglect but by false confidence. The collector who checks his hygrometer daily but never questions its accuracy is, in many ways, more at risk than the one who simply admits uncertainty. An uncalibrated device is not a safety net. It is a fiction.
What the salt test taught me is that patience is a form of precision. In my experience, the enthusiasts who rush calibration are the same ones who later can’t explain why their Nicaraguan puros are drawing tight or their Habanos wrappers are showing hairline cracks. The environment was off. The device they trusted was lying. And no one told them to verify it.
I also believe the offset recording method is underrated. When your built-in humidor hygrometer has no calibration screw, recording that it reads three points high and correcting for it mentally is not a compromise. It is actually a disciplined, accurate approach. What matters is that you know your instrument.
My honest recommendation: treat hygrometer calibration the same way you treat selecting a cigar for a special occasion. Give it your full attention, do it properly, and do it on a schedule. The humidor care guides at Dunnluxuryselections reflect that same philosophy. Precision in maintenance is what separates a curated collection from a cabinet full of cigars that used to be great.
— Belle
Protect your collection with Dunnluxuryselections

A calibrated hygrometer is only as valuable as the humidor it monitors. At Dunnluxuryselections, every piece in our collection is built to hold humidity with the kind of consistency that makes calibration meaningful. Our cabinet humidors are crafted for serious collectors who refuse to leave preservation to chance, with Spanish Cedar interiors and precision construction that support stable relative humidity across every shelf. For those who need portability without sacrificing control, our travel humidors maintain that same standard on the road. We also carry hygrometers and calibration accessories that pair perfectly with the methods described in this guide. Your collection deserves a sanctuary worthy of its legacy.
FAQ
What is the salt test for hygrometer calibration?
The salt test uses a sealed container with a saturated sodium chloride solution to create a stable 75% RH environment, allowing you to compare and adjust your hygrometer’s reading against a known standard.
How long should the salt test take?
Digital hygrometers need 6 to 12 hours inside the sealed container; analog hygrometers require at least 24 hours to reach full equilibrium before you read or adjust the device.
How often should I recalibrate my hygrometer?
Analog hygrometers benefit from recalibration every six months; digital devices should be verified at least once per year, or any time you suspect the readings have drifted.
What if my hygrometer has no calibration button or screw?
Record the offset between your device’s reading and 75% during the salt test, then apply that correction mentally to every future reading. This is a reliable workaround for fixed built-in hygrometers.
What humidity level is ideal for storing cigars?
The target is approximately 70% RH, with an acceptable range of 65% to 75%. Below 65% dries out wrappers and oils; above 75% creates conditions where mold can develop.
Recommended
You May Also Enjoy
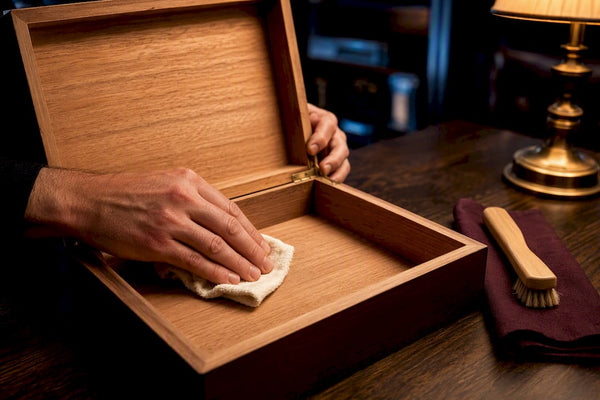
Save Flavor in 14 Days: Cleaning a Humidor for Collectors
For collectors: clean mold or plume without tainting cedar. Keep or toss decision rules, 14 days reseasoning, hygrometer...
Read Article
6 to 26 Weeks: Custom Humidor Timeline for Collectors & Gift Buyers
Plan a bespoke humidor with a realistic production calendar. See stage-by-stage timings, what typically adds weeks, and how...
Read Article
50/50 Propylene Glycol Ratio + 90/10 Flush for Collectors & Installers
Use a 50/50 propylene glycol ratio to hold passive humidors near 70% RH. Installer tested: occasional 90/10 water...
Read Article